You can use Microsoft Purview to search for specific content in Exchange Online (or SharePoint Online) using Content Search and, if desired, initiate a purge process. This article provides instructions on how to do this.
Before getting started
Note that you can also use Threat Explorer in MDO by performing a manual remediation or to take action on Advanced Hunting query results in XDR to initiate a hard delete.
KQL Query Example:
EmailEvents
| where Timestamp > ago(30d)
| where SenderFromAddress =~ "SenderFromAddress"
| project Timestamp, NetworkMessageId, SenderFromAddress, RecipientEmailAddress, Subject, EmailDirection, SenderIPv4, SenderIPv6
| sort by Timestamp desc
However, when using Threat Explorer or Advanced Hunting, you are limited to 30 days, which is sufficient for most remediation scenarios. This article describes how to use Purview to search for older mailbox data, such as mailboxes that are on hold.
Let’s begin
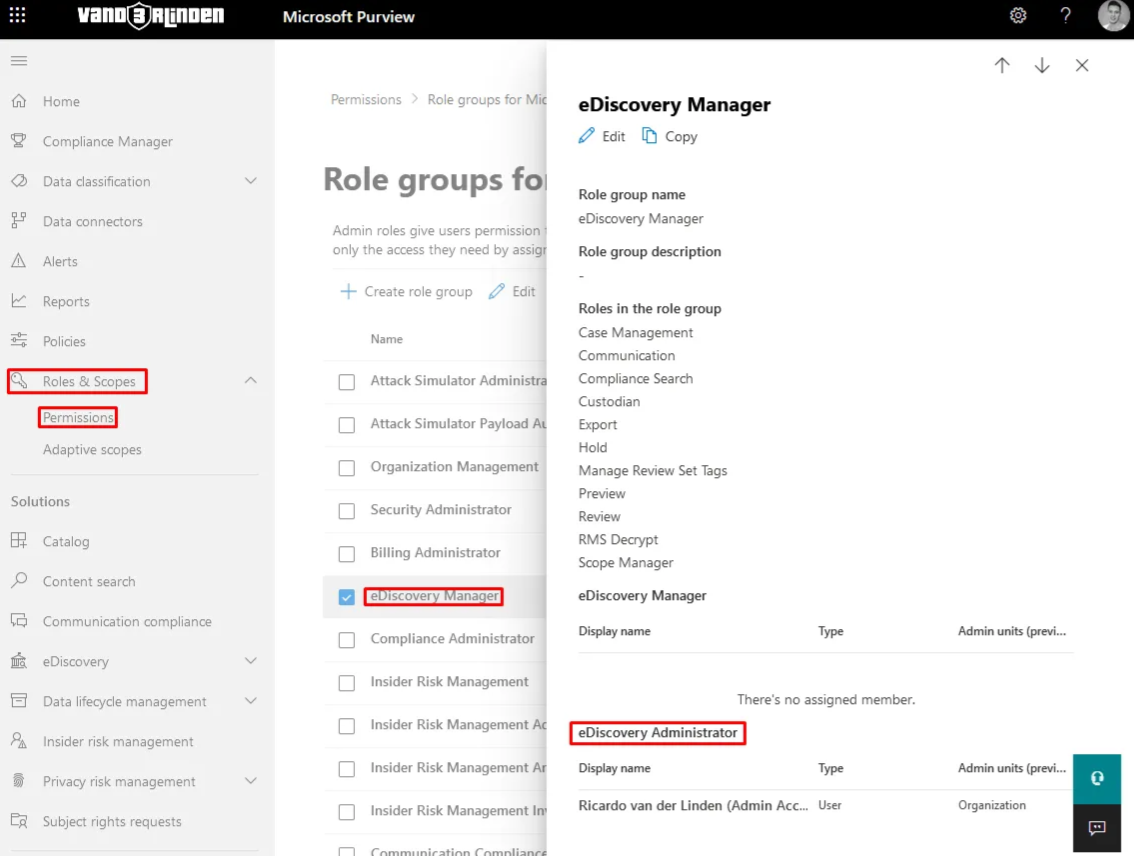
- You must designate yourself as an eDiscovery Administrator within the Microsoft Purview portal.
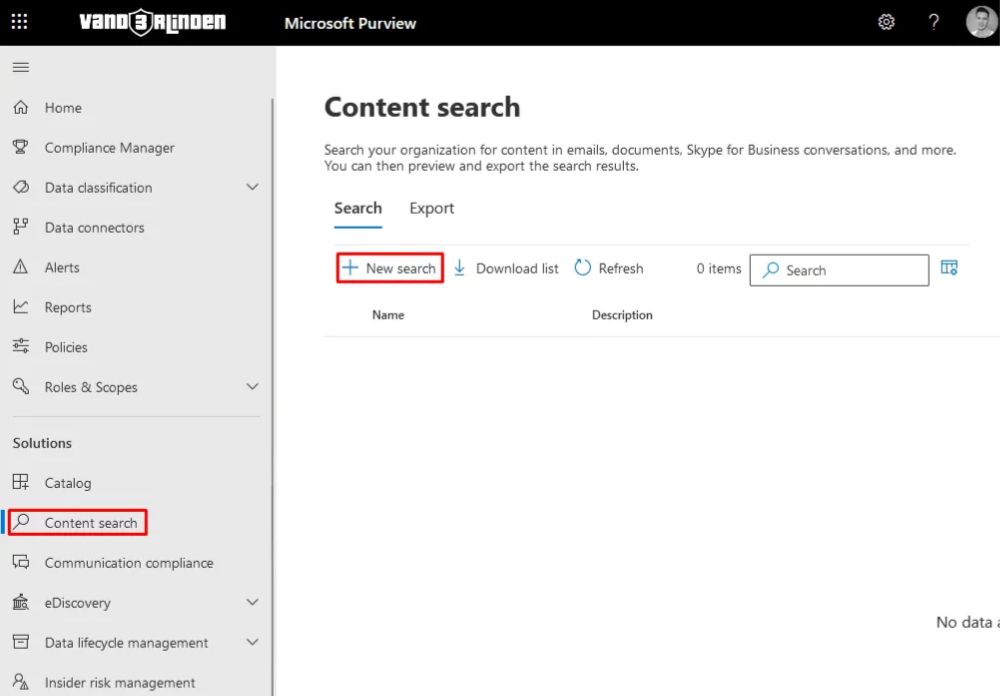
- Initiate the creation of a new content search.
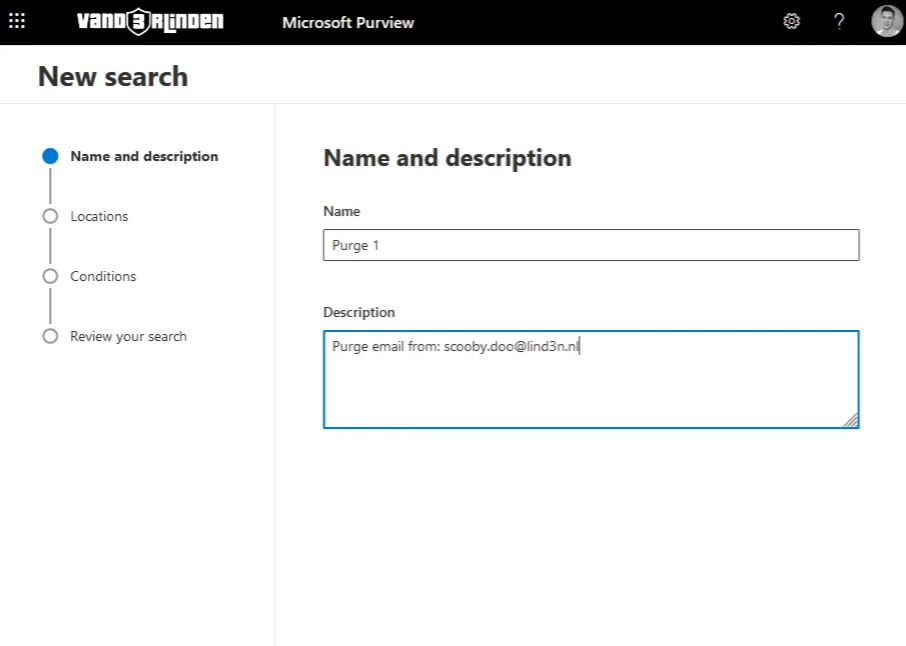
- Assign it a name such as Purge TICKETNUMBER, and in the description, outline the content you intend to purge.
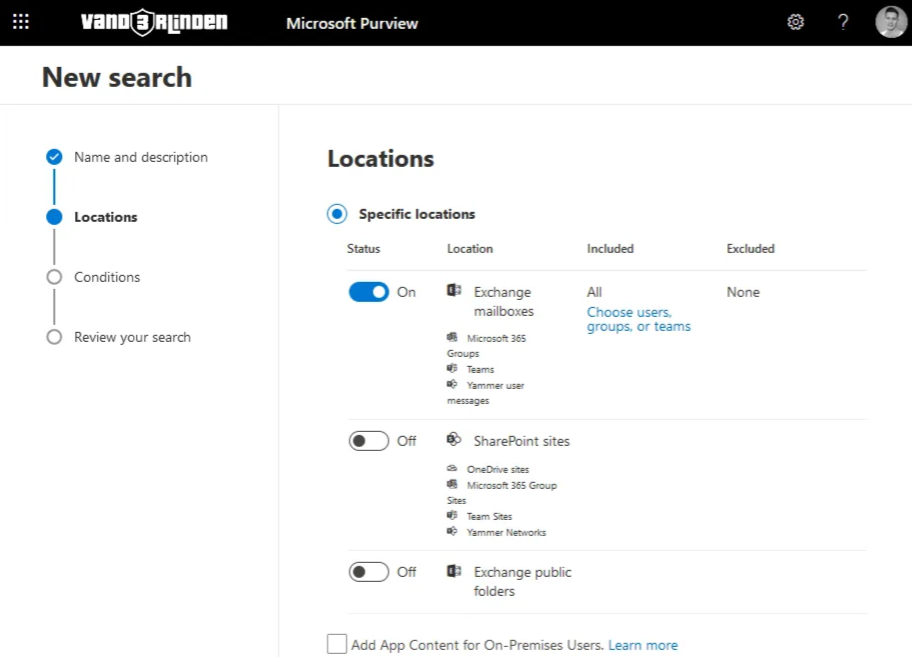
- Navigate to the “Locations” tab and configure the location settings to “Exchange Online,” encompassing all users.
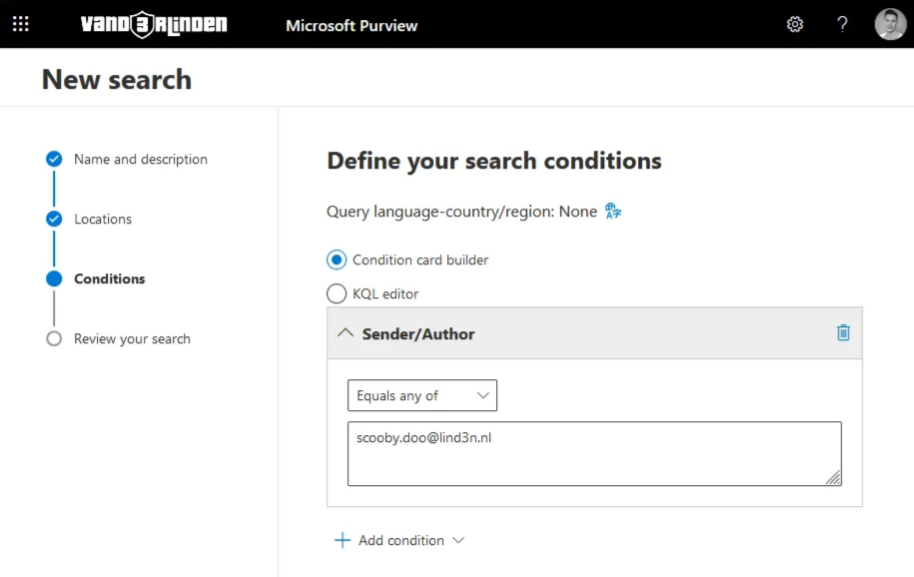
- Go to the Conditions tab and configure a condition using the Condition Card Builder, such as Sender or Subject. You can also use the KQL Editor to query the EmailEvents table for a more comprehensive search.
-
Once you’ve configured the conditions, proceed to the next step. Review your search settings and save the configuration.
-
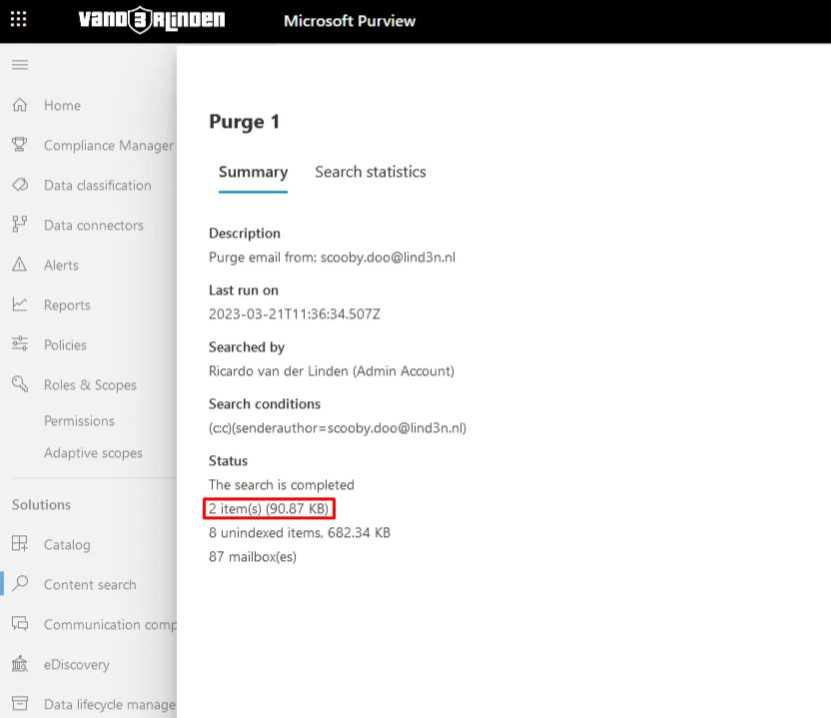
Once the search is completed, review the output by clicking on the search name.
IMPORTANT: Verify the emails you intend to purge by checking the preview. It’s crucial to confirm this, as failure to do so might result in deleting more than intended.
- Now, initiate the purging process for your search. To do this, log in to the Security & Compliance Center with PowerShell using the Exchange PowerShell module.
Connect-IPPSSession -UserPrincipalName UPN@domain.com
- Once logged in, you are prepared to delete the content as outlined in step 7.
New-ComplianceSearchAction -SearchName "Name of content search" -Purge -PurgeType HardDelete
- You can monitor the status of the purge using the following command.
Get-ComplianceSearch -Identity "Name of content search"
Ending up
After the purge is finalized, the content will be deleted from the Inboxes within a few minutes. It’s crucial to bear in mind, as mentioned in step 7, that purging should only be executed if you are 100% certain about the output of the search.
