Organizations have sensitive information under their control, such as credit card numbers or social security numbers. To protect this sensitive information and reduce risk, organizations need a way to prevent users from sharing it with people who shouldn’t have it. This practice is known as data loss prevention (DLP). In this article, I will explain how to configure it.
Sensitive information type entity definitions
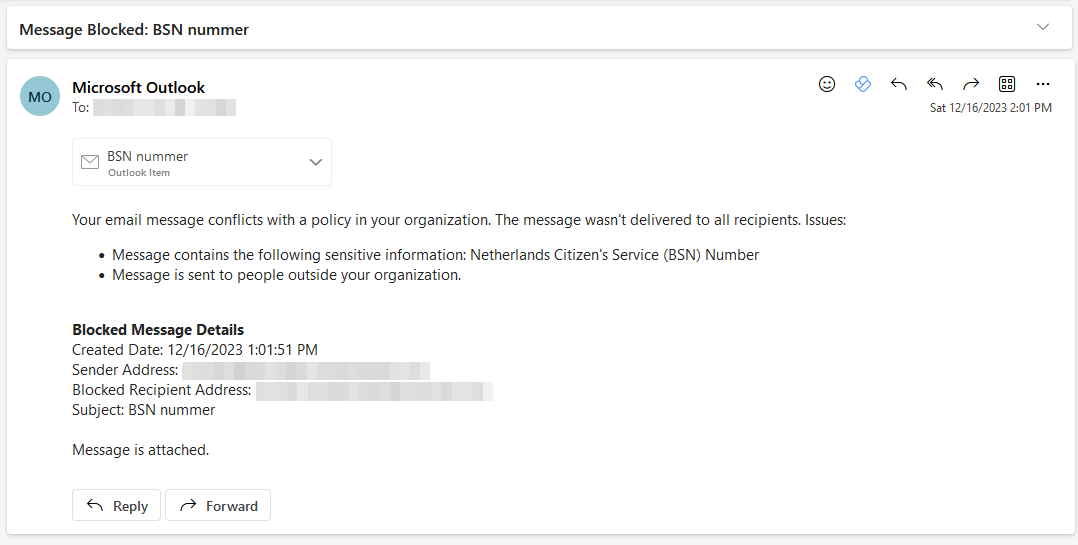
In this post, I will configure a DLP policy to block the Netherlands Citizen’s Service (BSN) Number from being shared with external contacts in Exchange Online and Teams. However, you can use this information to select any of the available sensitive information types or multiple types in a policy. These types of sensitive information are referred as Personally Identifiable Information (PII).
Creating a DLP Policy
-
Sign in to the Microsoft Purview compliance portal
-
In the Microsoft Purview compliance portal > left navigation > Solutions > Data loss prevention > Policies > + Create policy.
-
Select Custom from the Categories list.
-
Select Custom from the Regulations list.
-
Give the policy a name (policy name cannot be changed later).
-
Fill in a description. You can use the policy intent statement here.
-
Select Next.
-
Select Full directory under Admin units.
-
Set the Exchange email (Scope: All groups) and Teams chat and channel messages (Scope: All users & groups) locations status to On. Set all the other location status to Off.
-
Select Next.
-
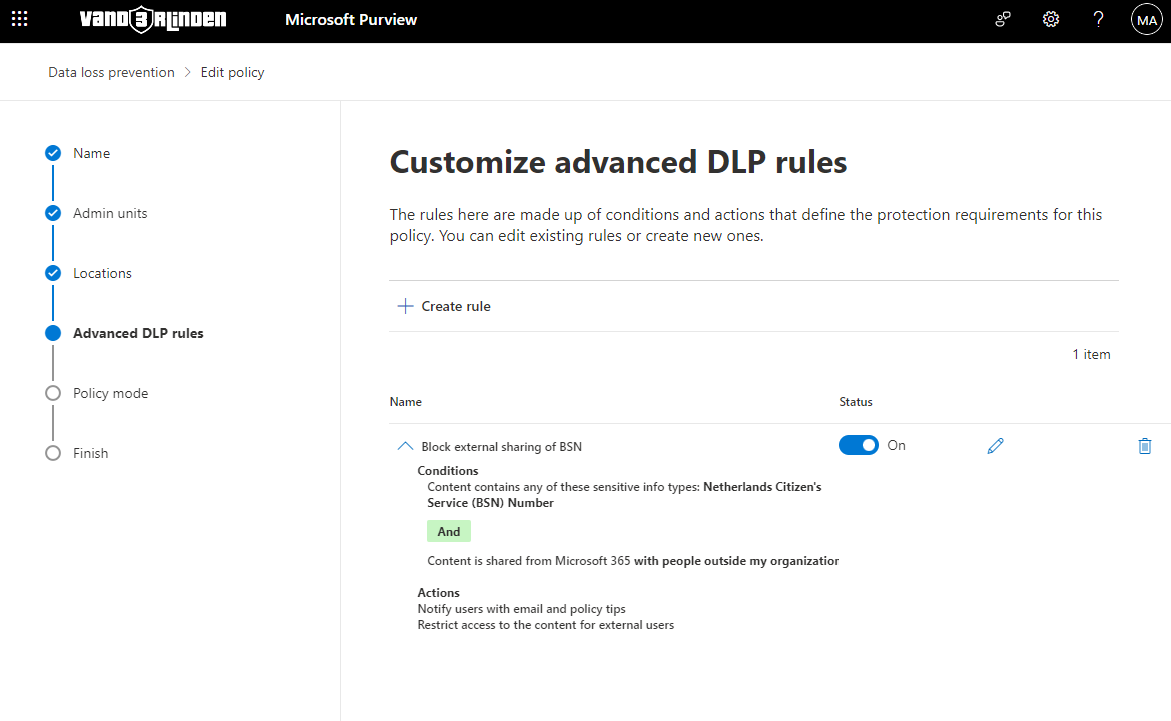
Select Create rule. Name the rule and provide a description.
-
Under Conditions select Add condition > Content contains > Add > Sensitive info types > Netherlands Citizen’s Service (BSN) Number. Choose Add.
-
Under Actions select Add an action > Restrict access or encrypt the content in Microsoft 365 locations > Block only people outside your organization.
-
Set User notifications to On.
-
Select > Notify the user who sent, shared, or last modified the content.
-
Under Incident reports, select whether you want to send a report to your (compliance) admins when the policy is violated.
-
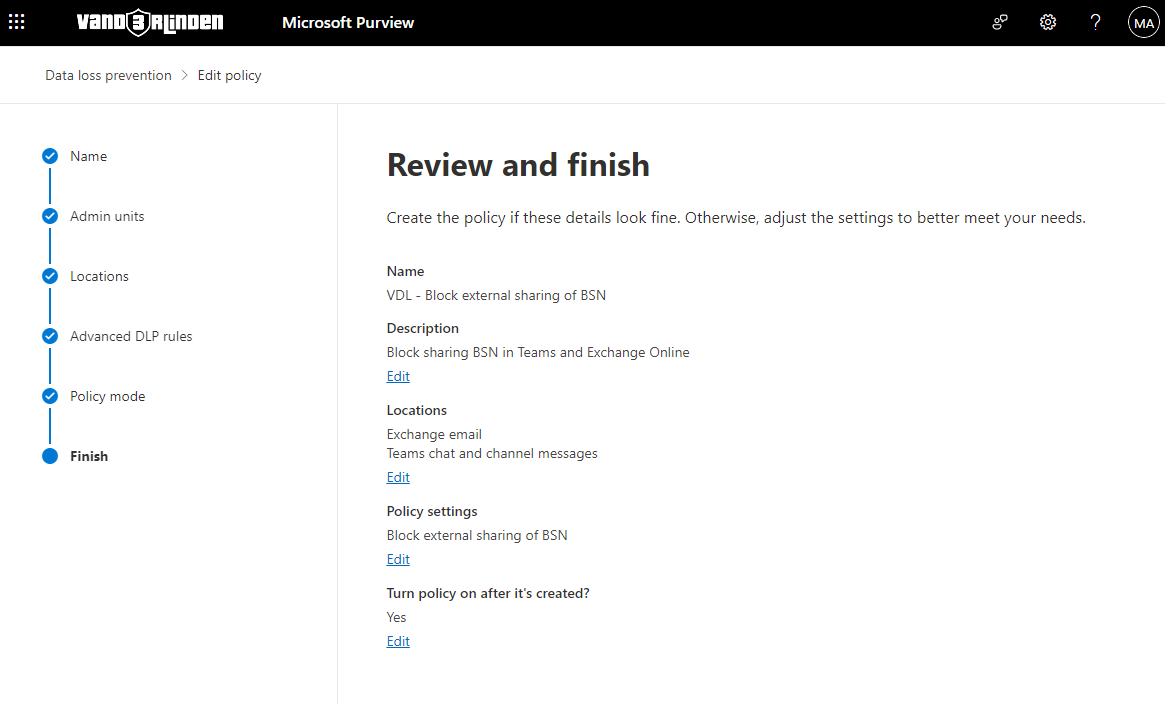
Select Save and you will be presented with a review of the rule.
-
Select Next.
-
Test or save your policy, it can take up to an hour for the policy to take effect.
-
Review and finish your DLP policy
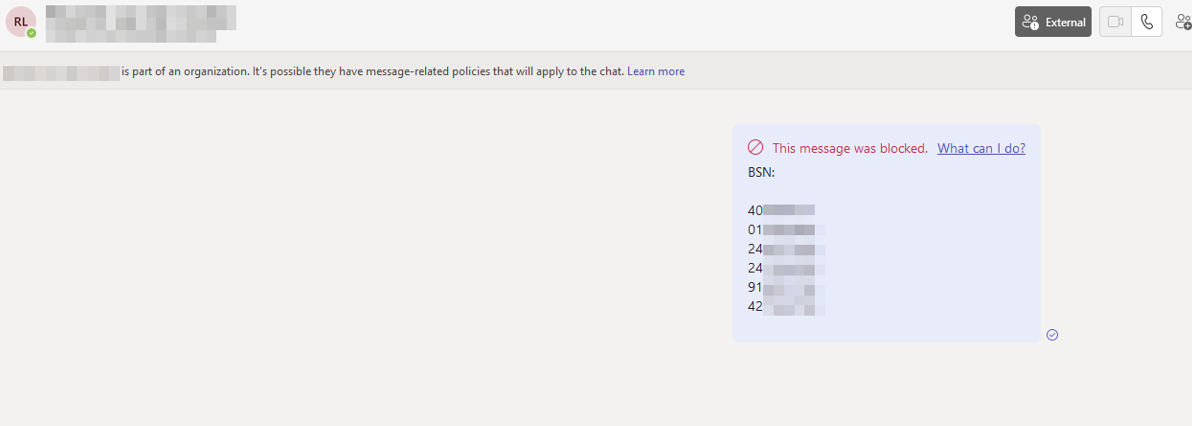
Try it out for yourself
You can test this yourself when the policy is active. The e-mail or Teams message must contain at least the keywords described here.
Do not use your own citizen service number or any other type of sensitive information for testing purposes. Search for an online generator such as https://cyberwar.nl/elfproef.html to generate Netherlands Citizen Service Numbers (BSN). Intended for creative testing, NOT abuse.
Examples
- Exchange Online
- Teams